

If you’re anything like me, you have tons of wine corks around your house that you know can be used for something but just not sure what. While there are tons of ways to incorporate these corks into the design of your decorating, this wine cork wreath is a great way to spice up your walls or even doors!
You will need the following simple supplies to get started:
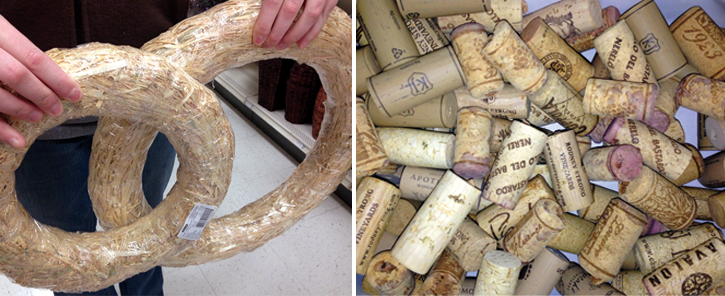
► a straw wreath of whatever size you would like (can be found at any local craft store- I used a 12 in. wreath)
► wine corks (approx. 130 for a 12 in. wreath)
► hot glue gun and glue sticks
► ribbon of your choice to hang the wreath -optional (I used 1 1/2 in. ribbon)
You can choose to start by wrapping the corks from the outside or the inside of the wreath. I started from the inside and worked my way out since the inside is a little bit more of a tighter space to work with. To make sure the wreath hangs flat on the wall/door, you will need to make sure the corks lay just slightly short of the width of the wreath, but not too much so that you can see the straw from the side. From the pictures below, you can see the edge of the wreath is just slightly past the corks.
  |
| back view // side view |
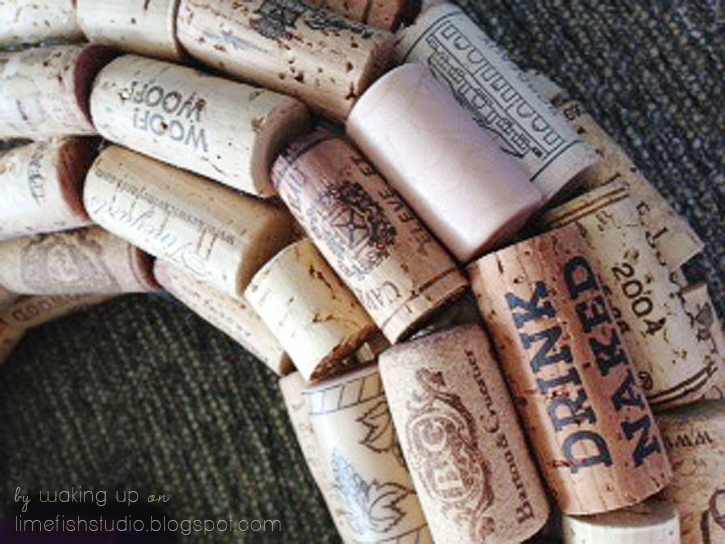
Not only does this prevent you or your guests from seeing the straw wreath from the side, but it also strengthens the durability of the corks. Between moving, storing and hanging, the corks will be more likely to fall off if they are hanging past the width of the wreath and banging into things.
As you are wrapping the corks around in circular bands on the wreath, be sure to pay attention to the colors, markings and words on the corks. Placing specific corks in the right spot for you will help personalize your wreath and keep those moments when you were sharing (or not sharing) that bottle of wine alive! There may also be times when you have to cut a cork to complete the circular bands around the wreath. A sharp knife and cutting board from the kitchen is all you need to resize your corks.
| back view |
An alternate design option to this project would be that you could place the corks randomly and lying slightly over each other. This would give a very 3D and more funky look to the wreath! I used approximately 130 corks to wrap a 12 inch wreath. Once you are done and the corks are wrapped all the way around your wreath like in the picture above, your wreath is ready to hang. Don’t mind the curious puppy in the photo. That’s just one of my sweet pits, Abby. She’s not needed for inspection even though she thinks she is!
The great thing about using the hot glue is that it dries relatively fast, but be sure all corks are set before you hang. You could choose to hang your wreath in various different ways, but I liked the contrast of corks against the satin ribbon as well as the wine color to play off the theme.
I just used a small nail and the bow of the ribbon covers it up so you won’t be able to see it.
I just used a small nail and the bow of the ribbon covers it up so you won’t be able to see it.

I am so excited to share my first post with everyone,
and keep in mind that enjoying a glass of wine during this project only makes it more memorable!
![]()
lauren from
a member of the 2013


.png)


Anonymous - Love it! Great idea, well executed!November 26, 2013 – 7:07 pm